Showing posts with label Baked goods. Show all posts

Monday, November 01, 2010

Orange-zested mexican wedding halloween spiders


29 years on, we still find ourselves getting all excited over halloween and costumes. Heck, there was even a theme this year with some of us honing in on our long-forgotten art & crafts skills to make insect wings, flower headgears and what not. We also tried downing shots of a wonderfully-scented vanilla vodka, but only 2 managed to finish that vile liquid. Foie gras is indeed very toothsome but not when you own one ya know.

Well, here's to that special bunch of never-say-die besties who just know how to keep you on your toes and young @ heart always. Love you guys.

These are mexican wedding cakes made with orange zest and almond meal. I stuck raisins for the eyes and Pocky chocolate sticks for the legs when the cookies were still warm.

Friday, August 20, 2010

A boule to call my own


i can only imagine that the smell of fresh bread baking in the oven evokes warm, comforting, cozy thoughts for most people. the promise of a crusty, soft loaf is enough to make anyone go weak in the knees, no? or maybe more so for bread people like me. i love 'em all - flat, leavened lebanese rounds, puffy golden brioche, baguettes, ciabattas, chinese-style mantous, japanese an-pans, wholewheat chappatis...you name it, i eat it!

it is an unfortunate thing that breads are getting taken over by substandard supermarket toasts that are designed for maximum shelf life and which really don't do much good for your insides i reckon. enriched with omega 3 and iron (read: reduced iron powder)? um, no thanks, shouldn't bread be made up of just water, yeast, salt and sugar? what's more in singapore, loaves like those i used to buy at harris farm in sydney are either not so readily available or are eye-poppingly expensive.

so, the most obvious next step would be to bake my own bread. eeaassy, right?

my first baguette was solid enough for a baseball bat that will make any burglar think thrice about stepping into our place. the second loaf i made was only slightly softer, but the only happy camper ended up being my dog. so when i finally decided to give jamie oliver's white bread recipe a last chance, boy was i glad i did.


mmm mmm MMMm. this actually turned out pretty darn nice. i cut myself a nice thick slab, slid it into the toaster and 2 minutes later, i was thoughtfully chewing through a lightly crusted, yeasty slice. i know this might sound awful for most people, but i think there's something rather earthy about the taste of yeast in bread. absolutely divine.

now i just got to figure a way not to polish off the loaf too quickly...*chuckle*

Sunday, June 13, 2010

Gateau Breton


i have never been one for fussy, fancy desserts...you know, the ones with pretty foams and intricate sugar-spun webs and so forth. that's not to say that i do not admire them - in fact i'm constantly wow-ed by those who are able to push the boundaries and limits of creativity to entirely new heights. these masterpieces are works of art and is an area i'll much rather leave to the geniuses to sort out. :)

rather, i have always been drawn to food for the tradition and culture. there's nothing i love more than to pore over articles, videos and blogs on the everyday foods that sustain and nourish people all over the world. there's something inexplicably soothing in the scene of women preparing leavened bread with their hands, or indian field workers sitting down to a simple but energy-packed lunch of uncooked dough and chutneys. these may seem like simple daily roles, but roles which others live and rely on nonetheless.


and since most communities lived frugally, one can expect that their dishes usually contained a few simple ingredients thrown together, which in my opinion, brings out the flavour of each component. such is this gateau breton from Brittany, made simply out of butter, sugar, flour and eggs. well, anything with butter catches my breath, and this is no exception. it is oh-so-especially good when dunked into a bowl of hot, fragrant coffee.

you can download the recipe from here. just some pointers: i substituted hazelnut meal for almond and it turned out equally good. also left out the glaze as i saw no point in wasting a whole egg for that. you can do that though if you want to serve up a prettier cake ;) finally you might want to cut down on the sugar - i found it a little bit too sweet, but it's a personal preference. Hope you enjoy your little bit of tradition!

Monday, December 07, 2009

A Citrusy Galette des Rois


I cannot wait. That is, to sink my teeth into all things buttery, yeasty and good. Yep it's less than 2 weeks til I leave for des vacances in France and I'm feeling antsy to get going. I swear I must be hallucinating 'cos I hear all those baguettes and croissants calling out to me, waxing lyrical with their flaky, crusty tones. Aaahhh.

Since my family and friends aren't able to come with me, I felt compelled to whip up a little bit of France for dinner last Saturday. One of my absolute favourites is this lovely citrus version of a galette des rois. It takes only 10 minutes to put together and another 20 minutes before you emerge with a soft, golden pillow, held high with the warm, almond-infused vapours.


I finally got to use the cookbook by Stephane Reynaud that my "tai lo" Ed + Ron got for me when I left for Singapore. :) It is a basic recette for a galette des rois, only zested with orange and pelted with a good squeeze of orange jus. I know you will enjoy it as much as everyone did. Bon ap!


Galette des rois (avec orange)
Adapted from Ripailles Traditional French Cooking by Stephane Reynaud
For 6

2 sheets of puff pastry
150g almond meal
150g caster sugar
2 eggs
150g butter
1 egg yolk
1 medium orange

Mix the almond meal and sugar together. Melt the butter, cool and add to the almond mixture. Add the eggs, zest and juice of one orange. Stir to just combine.

Roll the puff pastry out into 2 circles. Spread the almond mixture onto one of the disks, leaving a 1cm marign all around. Brush the edges with egg yolk and place the other disk on top. Seal.

Using the point of knife, trace a rosette pattern all over the top nad brush with egg yolk. Bake for 30 minutes at 180degC.

Tuesday, September 15, 2009

Buckwheat cake (Gateau de blé noir)


Buckwheat. It's grey, it's drab, it looks like Portland cement, but oh how I've come to hold it in complete adoration. Its nutty flavour. Its grainy texture. I love it in all forms - as crunchy grains tossed in a fresh green salad, in delicious buckwheat galettes (oh yes we used to prepare them quite often for dinner), and even as a beverage such as beer! :)


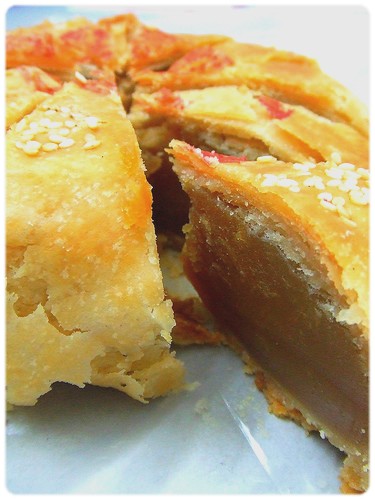
Just the other day, Mum bought some almond-based cherry michel cakes which reminded me of this recipe I came across some time ago on Melissa's much-loved Traveler's Lunchbox blog. Knowing how much Mum enjoys buckwheat like me (and in appreciation of how much laundry she's been doing for me as well heehee), this was one cake that had to be attempted.

Now, before you start going awwwww, cooking for my family isn't like cooking for my friends or for myself and E. Before you even get remotely close to the stove, you get bombarded with a million questions and probably an equal amount of cynical looks from four sets of raised eyebrows. Singapore's a place where you can get plentiful good food anytime, anywhere, so the questions would run from "Are you sure you even know how to ignite the stove" to "Whhhyyy do you even want to cook when you can buy it?". In times like these, I just roll my eyes at them and let my cake speak for itself.


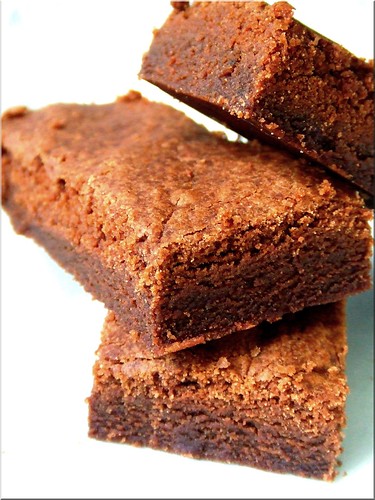
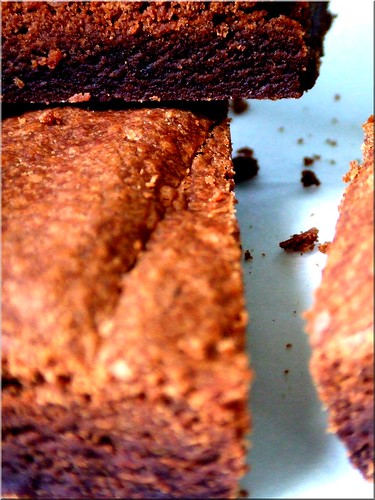
And it defended itself very well. When I bit into a slice at work, I had to hi-five myself. It turned out exactly the way I wanted it to - dark, grainy and lightly zested with orange with a texture akin to fine powdery sablé. I added a good measure of chopped walnuts for an added crunch. The best part? Me Mums loved it. And that totally made my day. :)

Torta di Grano Saraceno (Adapted from The Traveler's Lunchbox)
1 heaping cup (175g) almond meal
1 1/2 cups (200g) buckwheat flour
1/2 teaspoon salt
1/2 teaspoon cinnamon
finely grated zest of 1 large orange and juice from half the orange (or whole,si tu veux)
2 teaspoons baking powder
3/4 cup (175g) unsalted butter, at room temperature
250g sugar, divided
3/4 cup (180ml) milk
4 eggs, at room temperature, separated
1 cup of walnuts, chopped

Preheat the oven to 350F/175C.

Grease a 9-inch/23cm springform pan and set aside. In a medium bowl, stir together the ground almonds, buckwheat flour, salt, cinnamon, lemon zest and baking powder.

In another bowl, beat the butter and 1 cup (200g) of the sugar until fluffy. Add the egg yolks one at a time, beating well after each addition. Beat in the dry mixture alternately with the milk until everything is well combined.

In a clean mixing bowl and using spotlessly clean beaters, whip the egg whites with the remaining 1/4 cup (50g) sugar until they form stiff, glossy peaks. Stir one-quarter of the whites into the cake batter to lighten it, then gently fold in the rest. As a final step, fold in the chopped walnuts. Scrape the batter into the greased pan, smoothing the top.

Bake the cake in the preheated oven for 45-55 minutes, or until a toothpick inserted in the center comes out clean, covering the top loosely with foil if it begins to darken too much. Cool the cake for ten minutes on a rack, then carefully remote the outer ring and cool completely. Store, covered, at room temperature for up to 3-4 days. Dust with a little powdered sugar before serving, if you like. I found it sweet enough though.

Saturday, August 02, 2008

Fruit Fan Fare! August MBP 2008


With these little babies in season, it’s hard to walk past the fruit stall and not grab a bagful. Especially when the damage is only a mere $2! Oh the pure joy you get when finding a steal extends even to the fruit stall…?


Having bookmarked this recipe from Australian Gourmet Traveller for ages, I was glad when the perfect excuse to make it finally came up. Aparna of My Diverse Kitchen is hosting MBP August 2008 with the theme “Fruit Fare”, where fruit has to be incorporated into a dish. One of the rules is also to use a recipe from a fellow blogger, and incidentally, one of my all-time fave bloggers, Jen of Milk and Cookies has also made these and blogged about it before. You can read it here.


These baby lemon cakes were such a breeze to make, and my initial dismay at how little the batter for 2 servings seemed to be were soon turned to relief as I realized how moist and rich these were. Even better was the discovery of lemon-specked honeyed butter which I can see melting so beautifully on a nice thick slice of toast. Sweet heavens.

Served warm, this works out to be a real wintry treat! Try it and I’m sure you’ll love it.


Note: Some changes I made: (1) Instead of using lime, I used lemon. (2) As I didn’t have self raising flour on hand, I used good ol’ plain flour with a little bit of baking powder. (3) Also since I prefer whole foods, honey was used in place of sugar in all cases. (4)Yoghurt was used in placed of sour cream. (4) The passionfruit cream also called for icing sugar, but I omitted that and found it juste parfait. Feel free to add the icing sugar if you feel it isn’t sweet enough.


Baby lemon cakes with Passionfruit Syrup & Cream

Lemon cakes:

125g soft buerre

3/4 cup honey

2 tbsp finely grated lemon rind

3 eggs

1/2 cup yoghurt

1 cup self-raising flour


Passionfruit syrup:

1/2 cup honey

1/3 cup lemon juice

pulp from 3 passionfruit


Passionfruit Cream:

300ml thickened cream

pulp from 1 passionfruit

30gm icing sugar, sieved (optional)


Method:

1. Preheat oven to 170C. Beat le buerre, honey et lemon rind until light and fluffy. Add eggs and beat to combine. Add yoghurt and combine. Fold in flour and spoon mixture into 10 greased and prepared small cake moulds or a muffin tray. Bake for 15 minutes or until golden. Cool.


2. For the syrup, place all the incredients and 1/4 cup water in a small saucepan and stir over medium high heat. When combined, bring to a boil and simmer for 10 mins or until syrupy. Makes ~ 1 cup.


3. For the cream, combine the ingredients and whisk until soft peaks form. Refrigerate until needed.


4. To serve, pour half the warm syrup over cool cakes and serve with passionfruit cream and extra syrup passed separately.

Wednesday, July 30, 2008

Filbert Gateau with Praline Buttercream

It's that time of the month again - and the DB task this time is a Filbert Gateau with Praline Buttercream cake by Carol Walter.


Other than the slight panicky moment when the buttercream would not come together (this was fixed with a little bit of heat), the cake was relatively easy to whip up, having had some experience with Dorie Greenspan's Perfect Party Cake. And yes, it did involve a fair bit of creamin' and whippin' and my arm's still aching! I know I know, the call to get an electric mixer is getting ever stronger and resistance could be futile if I continue baking at this rate?


Anyway, shall keep this post short and sweet. Thanks to Chris of Mele Cotte for picking July's DB challenge! :) The recipe can be found at her blog!


PS: My darling boy got me a cookbook by Natalie Beauvais on Bretonne cuisine. I've already dog-earred several recettes! Trop Mad!

Monday, June 30, 2008

Danish pastry for one.


It's finally ready! A little late, but still very much here!

Right, so the June DB task was Danish pastries, or more specifically, a Danish braid using a Sherry Yard recipe. This is where I go off track a little. I still have more dough to make a braid, but I thought I'll leave that one till later in the week so I can share it with friends. (Food always tastes better when you get to share it with people you love dont you think?) For now, a single-serve Danish pastry suits me just fine.

I can't believe how easy this pastry was to make. The dough was beautifully speckled and smelt heavenly with the lemon peel and coarsely ground cardamom, making it a pure pleasure to roll out the dough each time.

Simplicity has always been key for me. So for the filling, I tossed together some thinly sliced Packham pears, a bit of honey, whole cloves and a drizzle of vanilla extract. Simple, wholesome and so satiating.


This dough really holds its own too. I made a tres petit crossiant from the cutouts and found it really, really good. Oh dear, at this rate, I'll never buy anything from the shops again!

Thanks to Kelly of Sass & Veracity, and Ben of What’s Cookin’? for hosting and coming up with this month's challenge!

DANISH DOUGH (Makes 2-1/2 pounds dough)
Ingredients
For the dough (Detrempe)
1 ounce fresh yeast or 1 tablespoon active dry yeast
1/2 cup whole milk
1/3 cup sugar
Zest of 1 orange, finely grated (I used lemon instead and found it works just as well)
3/4 teaspoon ground cardamom
1-1/2 teaspoons vanilla extract
1/2 vanilla bean, split and scraped
2 large eggs, chilled
1/4 cup fresh orange juice (Again, I used lemon juice in place of orange)
3-1/4 cups all-purpose flour
1 teaspoon salt

For the butter block (Beurrage)
1/2 pound (2 sticks) cold unsalted butter
1/4 cup all-purpose flour

DOUGH
Combine yeast and milk in the bowl of a mixer fitted with the paddle attachment and mix on low speed. Slowly add sugar, orange zest, cardamom, vanilla extract, vanilla seeds, eggs, and orange juice. Mix well. Change to the dough hook and add the salt with the flour, 1 cup at a time, increasing speed to medium as the flour is incorporated. Knead the dough for about 5 minutes, or until smooth. You may need to add a little more flour if it is sticky. Transfer dough to a lightly floured baking sheet and cover with plastic wrap. Refrigerate for 30 minutes.

Without a standing mixer: Combine yeast and milk in a bowl with a hand mixer on low speed or a whisk. Add sugar, orange zest, cardamom, vanilla extract, vanilla seeds, eggs, and orange juice and mix well. Sift flour and salt on your working surface and make a fountain. Make sure that the “walls” of your fountain are thick and even. Pour the liquid in the middle of the fountain. With your fingertips, mix the liquid and the flour starting from the middle of the fountain, slowly working towards the edges. When the ingredients have been incorporated start kneading the dough with the heel of your hands until it becomes smooth and easy to work with, around 5 to 7 minutes. You might need to add more flour if the dough is sticky.

BUTTER BLOCK
1. Combine butter and flour in the bowl of a mixer fitted with a paddle attachment and beat on medium speed for 1 minute. Scrape down the sides of the bowl and the paddle and then beat for 1 minute more, or until smooth and lump free. Set aside at room temperature.
2. After the detrempe has chilled 30 minutes, turn it out onto a lightly floured surface. Roll the dough into a rectangle approximately 18 x 13 inches and ¼ inch thick. The dough may be sticky, so keep dusting it lightly with flour. Spread the butter evenly over the center and right thirds of the dough. Fold the left edge of the detrempe to the right, covering half of the butter. Fold the right third of the rectangle over the center third. The first turn has now been completed. Mark the dough by poking it with your finger to keep track of your turns, or use a sticky and keep a tally. Place the dough on a baking sheet, wrap it in plastic wrap, and refrigerate for 30 minutes.
3. Place the dough lengthwise on a floured work surface. The open ends should be to your right and left. Roll the dough into another approximately 13 x 18 inch, ¼-inch-thick rectangle. Again, fold the left third of the rectangle over the center third and the right third over the center third. No additional butter will be added as it is already in the dough. The second turn has now been completed. Refrigerate the dough for 30 minutes.
4. Roll out, turn, and refrigerate the dough two more times, for a total of four single turns. Make sure you are keeping track of your turns. Refrigerate the dough after the final turn for at least 5 hours or overnight. The Danish dough is now ready to be used. If you will not be using the dough within 24 hours, freeze it. To do this, roll the dough out to about 1 inch in thickness, wrap tightly in plastic wrap, and freeze. Defrost the dough slowly in the refrigerator for easiest handling. Danish dough will keep in the freezer for up to 1 month.

Saturday, May 31, 2008

Olive oil and orange rosquillos


If you take a look at the food blogs around, it seems like almost everyone's already attempted a baked doughnut, except yours truly of course. I've bookmarked this recipe from Australian Gourmet Traveller eons ago and finally found the time to try it this morning.

And the entire batch almost ended up in the bin. 2 things happened. One: it wasn't a recipe for baked doughnuts but fried ones, but it did not deter me still since I am on a quest to eat more healthily. Two: I decided to ignore the quantity stated for the orange juice and go by 'feel' as I do sometimes. Uh-oh. For someone who loves everything in excess, the mere 1/2 cup of orange juice that the recipe called for didn't look enough and moreover I did not feel like wasting half an orange (yeah it was a BIG orange), so in went an entire cup (probably even a little more). So it's little wonder that the batter didn't come together as it should.

With my fingers stuck in what felt like gunk, it got to the point where I wanted to chuck out the dough and just settle for some Milo cereal and milk for brekkie instead. But the dough clung on so tenanciously that I decided what the heck, I'll just dip my hands in copious amounts of flour and try to do the best I can.


These were already brushed off as a lost cause and I only had enough curoisity to warrant 5 small rings. When the little rosquillos browned and cooled, I absently picked one up and nibbled on it. Thinking it would be rock hard from the excess amount of flour that was added, I was surprised when it was soft, chewy and bready. Mmm, not half bad really. Paired with a little chunk of 70 % cocoa chocolate that I had bought for making brownies for Tony, it was quite good too, but I found myself preferring the rosquillos on its own even without the recommended dredging in cinnamon sugar.

Before I knew it, I finished 3 little rosquillos. Think these deserve a try again.

Olive oil and orange Rosquillos
Note: The yoghurt I used in place of the pouring cream imparted a slight tangy, sourish flavour that people might not be used to. I only used it to make it healthier, but stick to pouring cream otherwise :)

1 egg
1/2 cup pouring cream (I used plain thick yoghurt instead)
1/2 cup freshly squeezed orange juice
1 orange, finely grated rind only
1/4 cup olive oil
1/2 cup caster sugar
2 cups self-raising flour
1 tbsp ground cinnamon
Vegetable oil for deep frying if desired
1 Combine eggs, cream, orange juice, orange rind, olive oil and 120gm sugar in a large bowl, mix to combine, add flour and mix until a soft dough forms, then knead for 1 minute. Divide dough into 20 pieces and roll onto a lightly floured surface to form 15cm-long cylinders, then pinch ends together to make little doughnut-shaped rings.
2 If you would like a sugar dressing for your doughnuts, combine remaining sugar and cinnamon in a bowl and set aside.3 For deep frying: Heat oil in a deep-fryer or large deep saucepan to 180C and cook rosquillos, in batches, for 4 minutes, turning once or until golden, then drain on absorbent paper. Cool completely, then coat with cinnamon sugar. Rosquillos are best eaten the day they’re made, but will keep for 1-2 days when they will be best suited to dunking in coffee.
If you wish to bake it, what I did was preheat the oven to 400F and put the rosquillos in til they turn brown (approximately 15-20 min).

adapted from Australian Gourmet Traveller

Wednesday, April 30, 2008

BAHnana-walnut-chocolate-buckwheat bread


I can imagine there are a few cocked up eyebrows around regarding the title of this post. It's a joke that came about when E was buying banana bread from a cafe. The French pronounce the letter "a" as "ah", so naturally it came out something like "Can I have some Bah-nana bread please?"

The lady behind the counter started cracking up so hard and handed him the slice, repeating "Bah-nana bread Bah-nana bread". The joke has stuck ever since. It's been some time now since that incident, but everytime we meet up with the gang, someone still repeats "BAh-nana bread" to him. lol.

Having been busy during the weekends which is usually my baking day, and after a wonderful long weekend away eating, drinking and making merry at Hunter Valley (we're now very happy owners of 5 bottles of boutique wines), I'm feeling more than ready to get back in the kitchen again. NQN is hosting a Banana Bake-off, and I've just been waiting for those bananas to brown nicely.


I haven't met someone who doesn't enjoy banana bread yet. Early mornings in uni usually means a detour to the Architecture cafe for some banana bread. I especially love mine toasted as it causes the crust to crunch up and caramelize nicely - it's my favourite part! E usually has the task of finishing whatever I can't, and he wasn't too impressed when I handed him a brown bag once, revealing a slice of banana bread with the edges nibbled away neatly. Oops.

I've baked my banana breads into muffin-sized ones which are perfect for brekkie on the go (also helps in my portion control! heh) The addition of buckwheat flour gives a pleasant, grainy nuttiness which I adore and the few dark chocolate chunks are quite the treat. And as usual, I've mooshed in more bananas and toasted walnuts than the original recipe calls for, but reduced the amount of sugar which the natural sweetness in the bananas nicely compensated for. Yummy!

Bahnana-walnut-chocolate-buckwheat bread (makes 6)
1/2 cup walnuts, toasted and coarsely chopped (optional)
1 cup all-purpose flour + 1/4 cup buckwheat flour
1/4 cup brown sugar
1/2 teaspoon baking powder
a pinch of baking soda
a pinch of salt
1/2 teaspoon ground cinnamon
1/2 teaspoon ground ginger
1 large egg, lightly beaten
1/4 cup butter, melted and cooled
2 ripe large bananas, mashed
1/2 teaspoon pure vanilla extract
a handful of dark chocolate chunks
Garnish: (Optional)
1 large banana, sliced or dried banana chips

Preheat oven to 350 degrees F (180 degrees C) and place oven rack to middle position. Line muffin trays with paper cupcake holders.

Lightly roast the nuts in a frying pan over medium heat, taking care not to let it burn. Let cool and then chop coarsely.

In a large bowl combine the flour, sugar, baking powder, baking soda, salt, cinnamon, and nuts. Set aside.

In a medium-sized bowl combine the mashed bananas, eggs, melted butter, and vanilla. With a rubber spatula or wooden spoon, lightly fold the wet ingredients (banana mixture) into the dry ingredients just until combined and the batter is thick and chunky. (The important thing is not to over mix the batter. You do not want it smooth. Over mixing the batter will yield tough, rubbery bread.) Scrape batter into prepared pan and place the slices of banana on top of the batter for garnish. Bake until bread is golden brown and a toothpick inserted in the center comes out clean, about 55 to 60 minutes. Place on a wire rack to cool and then remove the bread from the pan. Serve warm or at room temperature. This bread can be frozen.

adapted from Joy of Baking

Thursday, April 24, 2008

Cheesecake popsicles - April DB challenge

If there's any faster way to ruin a diet, it's to pack all your calories into innocuous little bite-sized pieces. They look so harmless in that state cos they look well, kinda tiny, and that means we can sort of waive off the calories right? Oh sure. Just wait til you put one in your mouth. Oh it's incredibly good. You ooooh and aaaahh and mmmm for a bit as you savour the last creamy traces.

You're about to take another bite when it hits. *Blank stare* Um, it's finished? Your eyes get drawn almost by what you're certain is some sort of magnetic field over to the tray of popsicles. The little devil on your shoulder who's been yelling and screaming and stamping his foot all week as you fill up on your whole foods, fruits and veggies is suddenly quiet. Oh yep, he's smirking. Before you know it, you pop one more, and another, and then what the heck, might as well stop counting and then before you know it, you can kiss your waistline goodbye.

Apart from the calorific stampede, the DB April challenge was quite the experience. As you can see, the challenge this time was a tweak on an all-time favourite - cheesecake! I've always loved thick, creamy cheesecakes, my absolute fave being the Chicago Cheesecake from Coffee Bean & Tea Leaf (which you incidentally can't find in Sydney). The gelatin-versions just don't cut it for me. If I'm going to have it at all, I rather go all the way. Sort of reflects my attitude to life. Yeouch.

This month's task was chosen by Elle and Deborah taken from Jill O'Connor's Sticky, Chewy, Messy, Gooey cookbook. The idea was to make cheesecake pops - perfect for a party I reckon - and dip them in a flavouring of your choice. Chocolate was the featured dip, but I was a tad skeptical of that and decided on a caramel au buerre sallee (salted caramel) coulis as well.


I may not have mentioned it, but curiosity is a main driving force for this blog, as is the love for all things sensory in life. Creating foods that I have never attempted or tried before and capturing the details of it all on film gives me a kick like no other, probably akin to a piece of music that transports you to that higher plane, or standing in front of a gorgeous scenery which sucks all the words out of you. For me, it's not knowing what to expect out of the end product til you see it and taste it. When it's great, fantastic. Sometimes it's not, and you just keep tweaking it til you find that perfection.

Thus it is no surprise that this was also a first-attempt at baking a cheesecake, let alone trying to make them into pretty, edible things! I was so pleased when the cheesecake crust took on a lovely golden hue. The texture was how I liked it to be exactly - the full crumbly, tangy taste of cream cheese which coats the inside of your mouth, accented by the addition of lemon (the recipe did not call for it, but I added the juice of one lemon in). The one grip that I had was the amount of sugar in it - I found it a bit too sweet. Some folks might like it like that though.

After leaving the cheesecake to firm up in the fridge, I scooped the little balls with a spoon and quickly shaped them in my palms, after which a bamboo skewer was inserted into it. The whole batch was left to freeze, and later coated with tempered chocolate. Here's where I deviated again and used heavy cream to make a dark chocolatey ganache in place of shortening (that is something that sounds dodgy to me and I would never ever want to buy). It worked out pretty alright, as did the salted caramel coulis. A couple were dipped into crushed graham cookies.

Overall the popsicles seemed to work quite well with the chocolate surprisingly, but I much prefer the salted caramel. Although if you ask me, I would make the cheesecake again and eat it on its own (the purist in me adores the simple, unadulterated taste of foods as it should be). The recipe can be found at the Daring Bakers blog. Hope you'll have as much fun as I did!

Note: I made only half the amount of cheesecake called for and found that the addition of the juice of 1 whole lemon gave it just the right amount of tang. The salted caramel coulis can be made by melting by reducing 1/2 cup of brown sugar and 1/4 cup of water into a dark syrup over med heat. Add 1/2 cup of heavy whipping cream, 3 1/2 tbsps of butter and 1 tsp of salt.

Saturday, March 29, 2008

My first Daring Bakers Challenge!


Finally got my first DB task down to pat! The theme was Dorie Greenspan's Perfect Party cake - the idea was to make a layer cake using her basic recipe and tweak it to any flavour you desire. Deciding on what flavours was no mean feat - there were just too many ideas that immediately popped to mind! Should I stick to the original lemon/coconut combination the recipe called for? Pandan cake with gula-melaka filling for a bit of Asian influence? Something totally wacky and off the beaten track? Believe you me, that got me stuck in a quandry for some time!

After the incessant to-ing and fro-ing and ho-ing and hum-ming, I decided to work close to the theme and use a lemond curd filling and a lighter whipped cream infused with lavender in place of the butter frosting. ("Lick your lips, help your hips", no?) This is the first time I've made lemon curd after reading so much about it, and I'm pleased to say it was deliciously tangy and sourish, exactly the way I like it.
Oh, the lavender cream. Ooh-la-la. All I can say is that it got me floored. Maybe prostrated. Definitely dancing in absolute reverence to light, billowy, lavender-perfumed clouds. It was simply, simply amazing. I had a hard time looking for the lavender flowers but finally hunted it down in David Jones gourmet foods! (Also couldn't help indulging in a pack of black sesame rice crackers there. Heaven.)

As for the cake, it turned out moist, citrusy and full-flavoured. This is the first time I've attempted a Dorie Greenspan recipe and it's no wonder she's so revered in the culinary circle. I must admit that though the cake was delicious and warranted no complaints whatsoever, I would personally prefer something a little lighter on the spongy side for layer cakes.

The most challenging part was probably assembling the cake, what with the Butter-fingers-itis i seemed to have mysteriously contracted over the past 2 days. Looking at the amount of mess I created and the 2 near accidents which almost saw the cake kiss the floor, it's a miracle I emerged out of the kitchen without any cream stuck on my hair! The results were all worth the effort though. I thought the cake didn't look half bad for a first try and the floral tones and citrus pair up ever so seamlessly. Definitely something I'll serve up at a party!

Here are the recipes for the lemon curd and lavender cream. I am usually quite generous with my seasonings, so feel free to chuck in more lemon/lavender buds if you feel like it!

Lemon Curd - the recipe calls for Meyer lemons but I used normal ones
1/2 cup plus 1 tablespoon sugar
3 tablespoons all-purpose flour
1/2 teaspoon salt
1 teaspoon grated Meyer lemon zest plus 3/4 cup Meyer lemon juice
1 large egg yolk
1 tablespoon unsalted butter

Whisk together sugar, flour, and salt in a small heavy saucepan, then add lemon juice in a slow stream, whisking until combined. Bring to a boil, whisking constantly, then simmer, whisking, until thickened, about 3 minutes. Remove from heat.

Whisk yolk in a small bowl, then add about one fourth of lemon-juice mixture, whisking vigorously. Whisk into remaining lemon-juice mixture and gently boil, whisking, 1 minute. Remove from heat and stir in butter and zest. Transfer filling to a bowl and cover surface with buttered parchment paper. Chill until cool, at least 30 minutes.


Heavenly Lavender Cream
1 1/2 cups heavy cream
3 tablespoons mild honey
1/2 tablespoon dried lavender blossoms

Bring cream, honey, and lavender blossoms just to a boil in a small saucepan, then remove from heat and let steep, covered, 30 minutes. Strain through a fine-mesh sieve into a bowl, discarding solids, and chill lavender cream, covered, until cold.

adapted from epicurious

Friday, March 21, 2008

a late post on irish soda bread.


I know it's waaay past St Pat's day, but well, dont think it's ever too late to put up a post on irish soda bread! Twas my first attempt (and taste!) at this and I have absolutely no clue or yardstick to measure it by. I was nonetheless thrilled when a nicely browned gigantic scone-looking mound emerged from the oven, all warm and toasty that I wanted to hold it close and hug it lovingly and let out sighs of contentment.

Ahem.

Anyway, the bread was to be an accompaniment to the Guiness beef stew that had been simmering slowly for over an hour, the chunky meat pieces lapping up all the goodness of the black stout. As soon as the stew was ready and the bread was cool enough to handle, I practically lunged at it with my knife, eagerly working it into nice thick slices. I slathered on a thick layer of my precious stock of Lescure buerre flecked with coarse sea salt (I couldn't find Kerrygold butter! La chance!) and sank my teeth into the bread. It was soft, surprisingly moist and had an almost cake-like quality to it, but that's when it happened. The brakes were slammed on my tastebuds as everything came to a screeching halt.

Something was amiss. My feet were still planted firmly on the ground; I wasn't jolted to cloud nine like I was expecting to!

Crap. The bread was SWEET.

I had been reading so much about irish soda bread and how gorgeously it pairs up with the highly salted Kerrygold irish butter, and I did come upon a few recipes offering the sweet version which included raisins, but I steered clear of these. There's nothing more I love than good savoury bread and salted butter, and my expectations of the soda bread laid somewhere between low earth orbit and the vast, vast outer realms of space. Of course this sounds nuts considering I've never even tasted this, but the rave reviews on this recipe just held endless promises!I even dipped it in the stew to see if it changes the taste. Bleah.

But well, all's not lost. It's not great as a savoury bread or with butter for that matter, but it definitely holds its own when eaten plain. I'm sure it'll be delicious with some confiture or thick cream too. As for me, I've got tentative plans for some nice creme brulee style french (irish?) toast..

Meanwhile, here's a little clip of one of my favourite songs: Brian Boru by Alan Stivell. It might just put you in the mood for some irish bread! :)

Thursday, March 13, 2008

Spectacular Cupcakes 2008


Cupcakes have always intrigued me. I've always thought of them as some fancy food phase that'll come to pass in time. Pretty as they are, I think the sugary frosting is usually just plain overkill. Or maybe I'm used to the idea that a good cake doesn't need much adornment and should be flavourful straight up.

Yep. Only 2 things seem to be guaranteed out of a cupcake: toothaches and an expanding waistline.

So when I stumbled upon Spectacular Cupcakes 2008 by Arfi of Homemades, I thought tis time for the cupcake to redeem itself. If I dont like what I find out there, why not tweak it to a standard that I'll enjoy?

And if there's one flavour I totally adore but always totally manage to screw up, it's gotta be green tea. The both times I've tried it were in the form of cakes and I've always encountered the same problem - the amount of tea is never enough! I can't bring out the hint of tea no matter how much tea I add! (If anyone knows why, pleeeeaase drop me a note.) The saving grace in this cupcake was the sencha frosting - I omitted 3 quarts of the sugar in the cream cheese frosting but it was still sweet and deliciously tangy. Yummay.. I could polish off the frosting by itself! The recipe can be found here. I used double the amount of sencha and decreased the amount of sugar. I would also decrease the amount of flour by a little for a moister cake. Can't wait to check out what the others have come up with!

Alright to bed...I'm so exhausted! Thank goodness the weekend's almost here. TGIF! :)

Sunday, March 09, 2008

Recycling chocolate ganache.


Oh god, just finished cleaning the kitchen inside out. You can't believe the rate at which mould grows here. It attaches itself to EVERYTHING, even the walls! You can't even leave your bread out for more than 5 days 'cos you'll find the little wicked green spores come a creepin' n crawlin'.

Had a really good session out on the water today. We did pyramids up to 160 which felt immensely good on my right side surprisingly, but I ease into my technique on the left side a lot easier. The huge post-padding yum cha was even better - we went to the new resto at the fish market. The food was awweeessoome, and the mango desserts have got to be the best I've ever tried in Sydney! Tender slices of mango tucked into sweet cream are rolled into fat rolls of soft, pliable crepes and one bite had all of us ooh-ing and aah-ing. The mango pudding with its generous portions of mango flesh and ample layer of evaporated milk topping was totally in a league of its own. I shared one with bebe and was so tempted to have another one but my stomach regrettably has its limits *sulk* :(

Well ever since reading this excerpt from one of my all-time fave blogs, I've been consciously thinking twice before wasting any food. I admit one of my bad habits is cooking in excess, only to store the remnants in the fridge and forget all about it til it starts to look suspicious, then into the poobelle it goes. This thoughtful article got me thinking of all the energy that goes into your food, from the farm to the processing factory and finally to your plate. A lot of hard work and an unbelievable amount of resources are involved and it's no wonder the earth is groaning under all that strain. Same goes for all your products. So recycle and reuse if you can!

So when the 2-week old dark chocolate ganache from Jinn's chocolate torte surfaced, tempted as I was to chuck it out, I decided it'll do nicely in a chocolate tart. Perfect for using the gorgeous little beaten tart molds I bought yesterday from QVB. (I got 2 little souffle ramekins and finally a much-coveted butter tray too - they were all on sale! Basement of QVB) A couple of slices of frozen shortcrust pastry and a bit of ganache-reheating is all it took to assemble this. Minimal sweat and absolutely sublime.

Just gotta wait for the ganache to set now and a little bit of Greys and I'm done for the weekend! :)

Friday, January 18, 2008

Mooncakes and noodles!


To celebrate the union of two families, it is a long standing Chinese culture to send out gifts of sweet cake along with the wedding invitations. The cakes are normally stamped with a dragon/phoenix or with a 'double happiness' sign in red. So in observing the tradition, my sis and B.I.L. ordered Teochew mooncakes from Mui Lee, a bakery famous among the older generations.

The Teochew-style mooncakes differ from the normal mooncakes in the skin. A dark, dense and sweet filling made from beans is enveloped by leaf-thin, buttery layers in place of the softer, chewier skins. I don't want to be biased, but honestly, Teochew mooncakes kick ass. And this one takes the cake. The older generation really know their stuff - the filling was silky smooth and sinfully rich, the skin crisp, light and delightfully flaky. The oiliness in the paste only further amped the crunch factor at the base of the pastry.

Needless to say, all grand plans to shape up before the wedding flew out the window. I helped myself to 2-3 good-sized slices in the span of one day. And the fact that we have 3 more at home just doesn't help my cause. Ignoring the mooncake is just next to impossible.


One other thing that I've been amazed with since I was back was the quality of the hawker food centres. Many of them have been given facelifts with the hawker centres looking much more airy, smoke-free and and cleaner now. I mean come on, there are even ESCALATORS in the food centre!!! It was with a slight tinge of nostalgia that I reminisced about the older style hawker centres.


My first hawker dish of 2008: noodles with minced pork and liver. The flat mee pok noodles are my favourite since they easily pick up the chili sauce and the liver was soft and pliable. Very more-ish!

Hitting Prive tonight with the girls! Can't wait to see them!!! :)

Sunday, January 06, 2008

Sables

One of my strongest memories of Brittany is that of the food, and in particular, sables or 'sand cookies'. This Breton butter cookie has a crumbly texture akin to that of sand - hence the name - and hails from the region of Normandy.

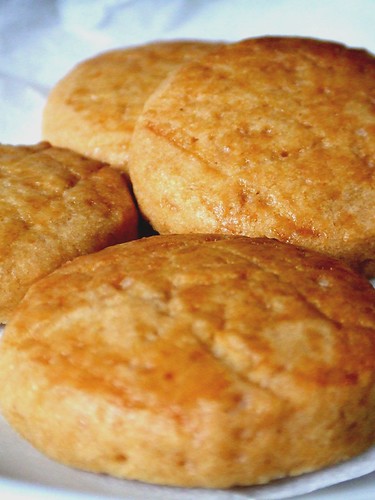
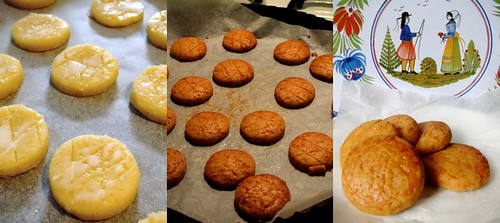
The sables normally come in a tin box - I purchased one with prints on it mimicking the highly prized porcelain from Quimper. What really left an impression on me was that every person we visited had one of these at home, which tickled but endeared me to the people even more. The Breton sense of identity is very palpable; you can sense it in the architecture, traditional music, their no-holds-barred mannerisms and of course, the food.

Sables, galette bretons or petite buerres were the protocol whenever we popped by someone's place for tea. While everyone was busy catching up in French, I kept busy nibbling on these little golden rounds while trying to pick up certain bits of their conversation.


After all the cooking during the festivities, I found myself wanting to bake something simple. Being in Gloucester for the 2 days just made me miss the countryside so much and brought back memories of my holiday in Bretagne and of dear friends that I have made there. And almost like an after thought, these galette Bretons popped into mind.


So there I was in my kitchen, standing over the fresh batch of warm cookies in all my eagerness to pop one as soon as they were cool enough. One bite into the crumbly cookie brought back a flood of memories and a warm feeling of comfort :)

These cookies aren't very sweet, but that's the way I like it. Feel free to add more sugar if you like your cookies sweet!

Sables (French Butter Cookies)
For this recipe, I used milk in place of egg for the glaze. You can also add a citrus zest or extract or rosewater to the cookies if desired. I wanted mine plain so I stuck with the original recipe

10 tablespoons (140 grams) unsalted butter, room temperature
1/2 cup (100 grams) granulated white sugar
1 large egg
1 teaspoon pure vanilla extract
2 cups (280 grams) all purpose flour
1/2 teaspoon baking powder
1/4 teaspoon salt
3 tbsps of milk

In a bowl, beat butter and sugar until light and fluffy (2-3 minutes). Add the egg and vanilla extract and beat until blended.

In a separate bowl, whisk together the flour, baking powder and salt. Add the flour mixture to the butter mixture and beat just until incorporated. Do not over mix the dough.

Transfer the dough to a lightly floured work surface, knead the dough a few times to bring it together, and then divide the dough in half. Wrap each half in plastic wrap and refrigerate until firm (at least an hour).

Preheat oven to 350 degrees F (177 degrees C) and place rack in the center of the oven. Line two baking sheets with parchment paper and set aside.

Remove one portion of the dough from the refrigerator and place on a lightly floured work surface. Roll out the dough until it is 1/4 inch (1 cm) thick. Using a lightly floured 2 inch (5 cm) round fluted cookie cutter, cut out the cookies, placing them on the prepared sheet. Place the baking sheet of cut out cookies in the refrigerator for about 15 -20 minutes to chill the dough. Remove the cookies from the refrigerator and brush the tops with the milk. Then, with the tines of a fork, make a crisscross pattern on the top of each cookie. Bake cookies in the preheated oven for about 12-14 minutes (depending on size of cookie) or until golden brown around the edges.

Cool cookies on wire rack. Store in an airtight container for up to a week.

adapted from Joy of Baking

Friday, December 21, 2007

Mocha Shortbread


I can't believe Christmas is here once again. Last year I was in HK with my family, jostling with the crowd and street shopping endlessly from one lane to the next. This year will be one spent quietly over dinner and drinks with friends in Sydney. Though of course I still wish my family and besties were by my side, I'm more than content for having friends here to spend my holidays with. Yep, they are the people who make time here fly just that little bit faster, not to mention sweeten it by making it so fun!

So, to wrap up the year, I wanted to do something special for them to just show them how much they mean to me. I'm kind of a emo-idiot, if you can call it that way. I get stuck often a time when trying to verbalize or show my emotions physically even though I want to, probably a result of a traditional Asian upbringing. Whatever it is,, I decided to do what I do best next - write & bake of course. :)


I ended up making two batches of cookies - one batch of candycane cookies (in my last post) that were probably cuter to look at than eat, and another batch of mocha shortbread. I just adore the texture of shortbread and how it starts off all crumbly and then melts so beautifully in your mouth. These shortbread fingers were all that and more - dark, chocolately and intensely flavoured with coffee; definitely one for the grown ups. There's just one catch: if you aren't the owner of an electric mixer like me, be prepared to get your heart rate up for a good workout. Even with all that dragonboat training, this was tough for me. LOL.
Hope you enjoy this. Happy Holidays! :)

Mocha Shortbread
Note: For this recipe, I reduced the flour to 2 cups and substituted 6 tbsps flour for 3 tbsps cornstarch since I didn't have any cornstarch on hand.
1 1/2 cups confectioners (powdered or icing) sugar
3/4 cup Dutch-processed cocoa powder
2 cups all-purpose flour + 6 tbsps (or 3 tbsps cornstarch)
1/2 teaspoon salt
1 1/2 cups unsalted butter, room temperature
1 1/2 teaspoons (6 grams) pure
vanilla extract
2 tablespoons (8 grams) instant espresso powder

Preheat oven to 325 degrees F (165 degrees C). Lightly butter (or spray with Pam) a 15 x 10 inch (38 x 25 cm) baking pan.
In a small bowl, sift the confectioners sugar with the cocoa powder. Set aside.
In another bowl, sift the flour, salt (and cornstarch if you're using it) together. Set aside.
In the bowl of your electric mixer (or with a hand mixer), cream the butter until smooth (about one minute). Add the sugar and cocoa mixture and beat until fully incorporated (about 2 minutes). Add the vanilla and espresso powder and beat until incorporated. Then add the flour mixture to the butter mixture and beat until the dough just comes together.
Spread the dough over the bottom of the prepared pan and gently press the dough, with your fingertips or the back of a spoon, to form an even layer. Then, with a sharp knife, score the top of the shortbread into approximately 3 inch x 1 inch (7 x 2.54 cm) fingers. Bake for 12 to 15 minutes, or until the top is dry and a toothpick inserted in the center comes out clean. Remove from the oven and place on a wire rack to cool. While the shortbread is still warm, re-cut the shortbread into fingers. Cool completely before removing from pan.
Adapted from Joy of Baking